App Manual

Find the app for your area of interest on the SPOTTERON app overview. On the left, you can filter your search by topic, language, and location. Click on any app project's detailed view to find a detailed description, images of the app, links to the smartphone apps, and a link to the homepage or map.
Follow the link to your App Store and install the app on your Android or IOS smartphone. As an alternative to the app, you can also enter your observations on the interactive map of the project website.

After you've downloaded and launched the app, you can register your SPOTTERON account by entering your email address and username. The user name does not have to be your real name. Just make sure it consists of at least six characters. Pick a password with at least eight characters. After registering a new account, you are logged in immediately. In a second step, you can optionally set up your user profile - all information and the profile picture you upload are voluntary.
After that, you can start immediately with the entry of your first spot in the app!
One user account, many apps!
You can also use your new SPOTTERON account for all other apps on the platform without re-registering! Just use the same email address and password you signed in with, and you'll be able to enter your observations and content on the app's topic.

When an App uses functions of your smartphone or tablet, like e.g. the camera or GPS, it needs to ask for your permission to be able to access that functionality. All Apps on the SPOTTERON platform ask for just a minimum um necessary core permissions:
- Access to your location: used for zooming the map onto your area.
- Access to your media & camera: used for adding photos to your spots.
After the introduction slides, the App will ask for the first permission: Access your location. This permission allows the App to simply display the map area correctly and zoom to your approximate position on our planet. Please allow the App to access your location to have your GPS working correctly.
When you create your first spot, you can add a photograph to it. In some Apps, this photo is even mandatory for e.g. documentation. Photographs can be added via camera or from your photo gallery on your phone. In either case, the App needs permission to be able to access your camera or gallery so you can choose or take your photograph for your spot.
Further permissions:
In some Apps, there are additional features requiring further permissions. For Apps allowing the recording of audio and sound, for example, the App asks for permission to access the microphone. We always let the Apps ask for just the minimum of necessary permissions and do not use your data in any other way than providing the functionality of the App for you.

Adding new entries in the apps on the SPOTTERON platform is easy.
Open the "Add Spot" Dialogue:
Press the + symbol in the middle below to enter a new spot, and a new dialogue "Enter spot" opens.

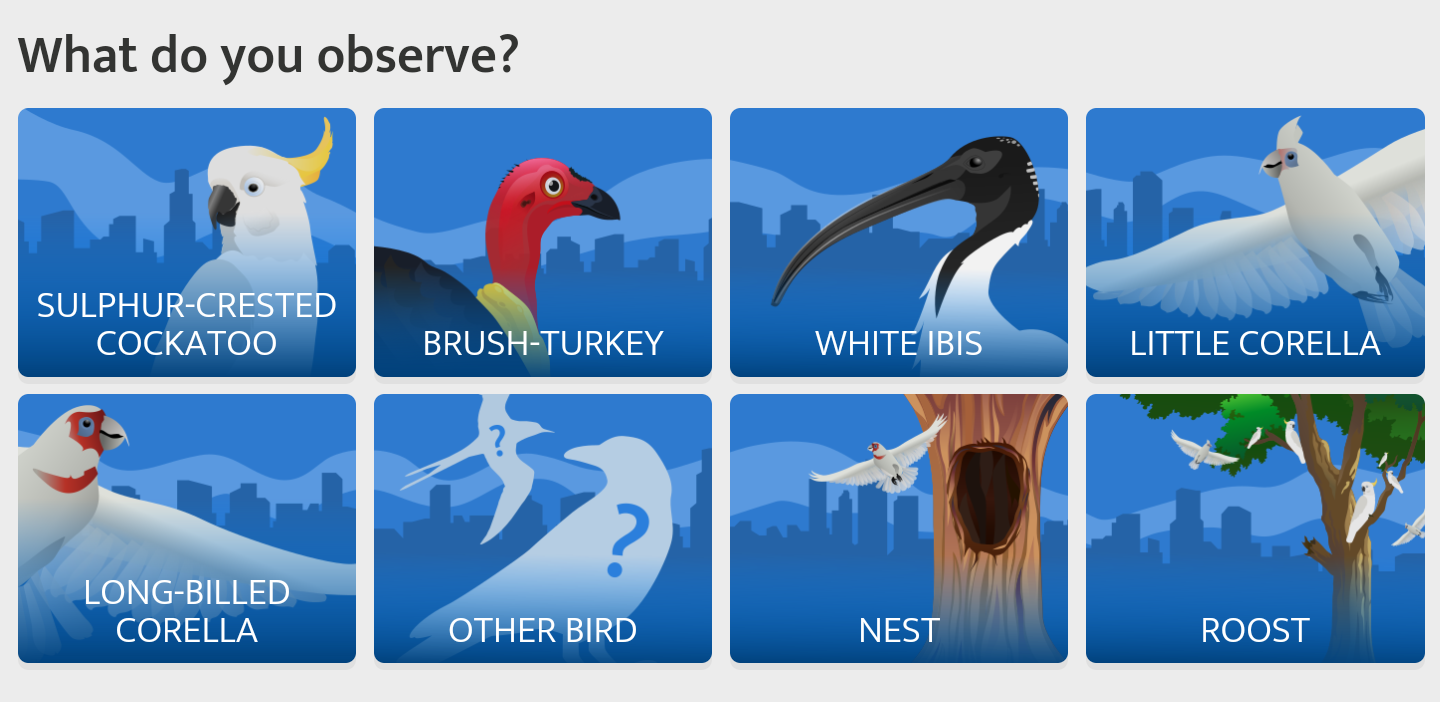
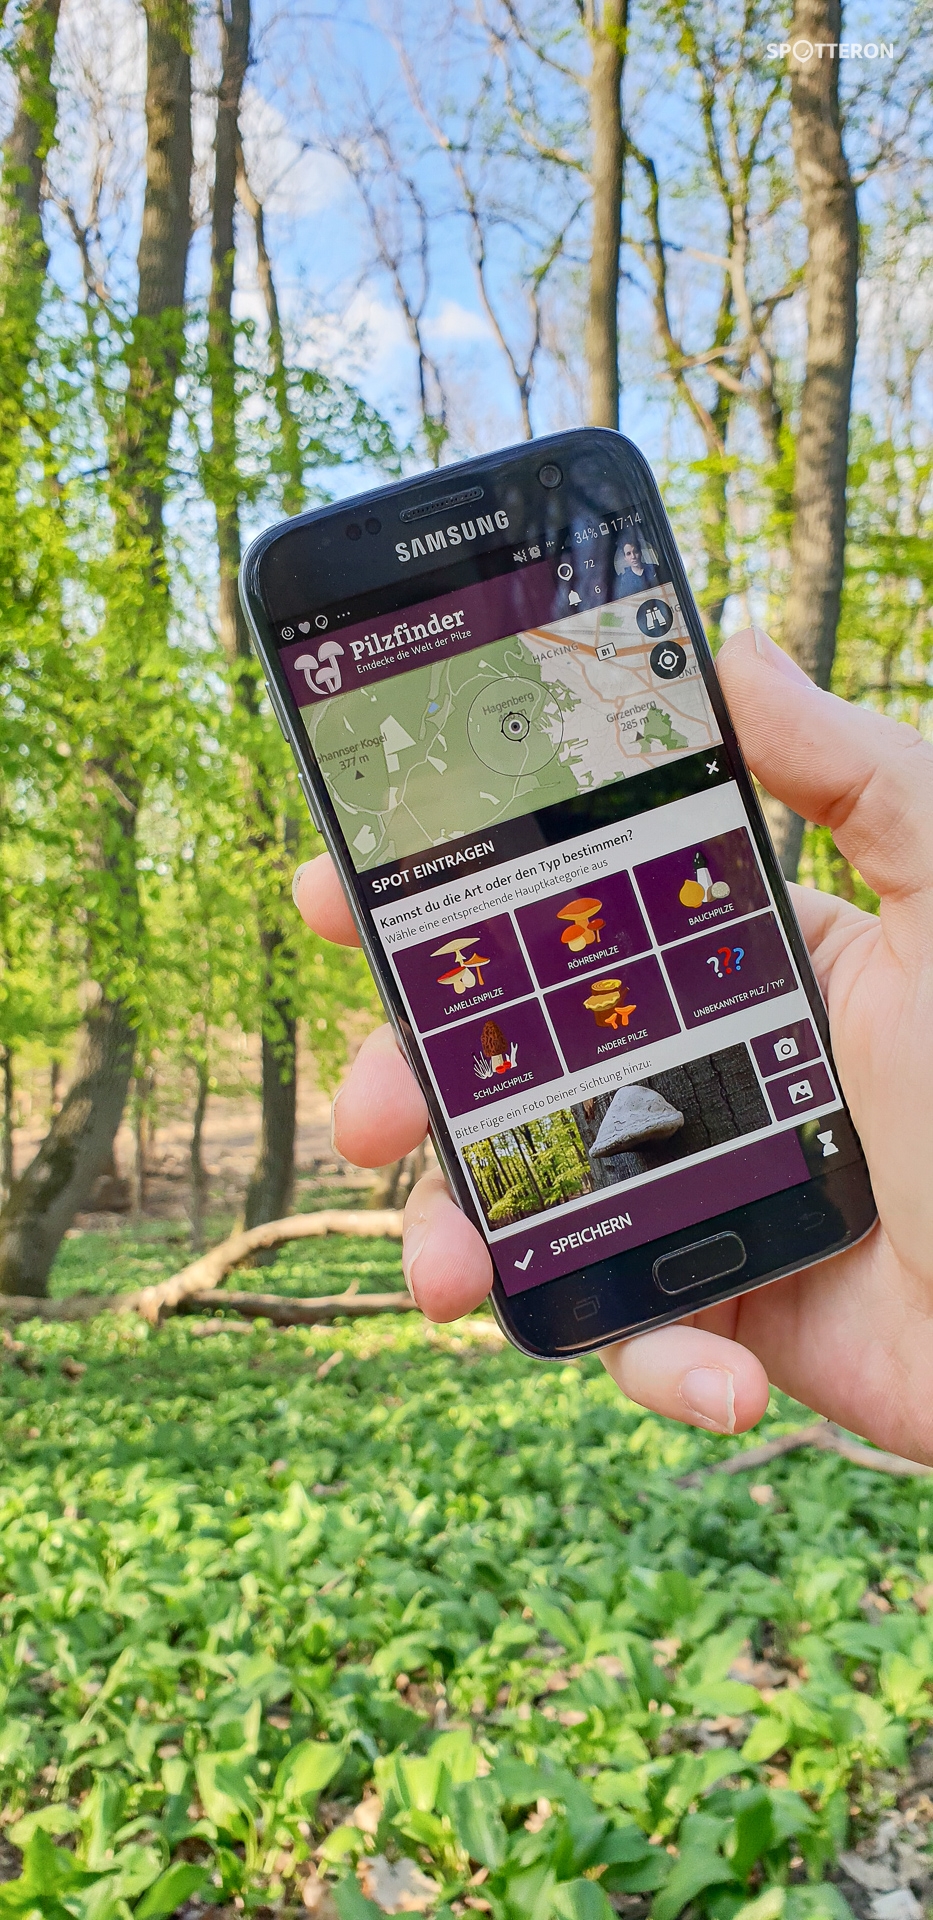
 Select a Category
What do you observe? Select the correct category for your observation item.
Tip: Depending on the project/app you participate in, there are different questions and information that you can fill in. Not all are mandatory, but the more information you can enter, the better! Don't worry if you don't know everything in the beginning. The community and the project leaders are here to support you, and we help each other out!
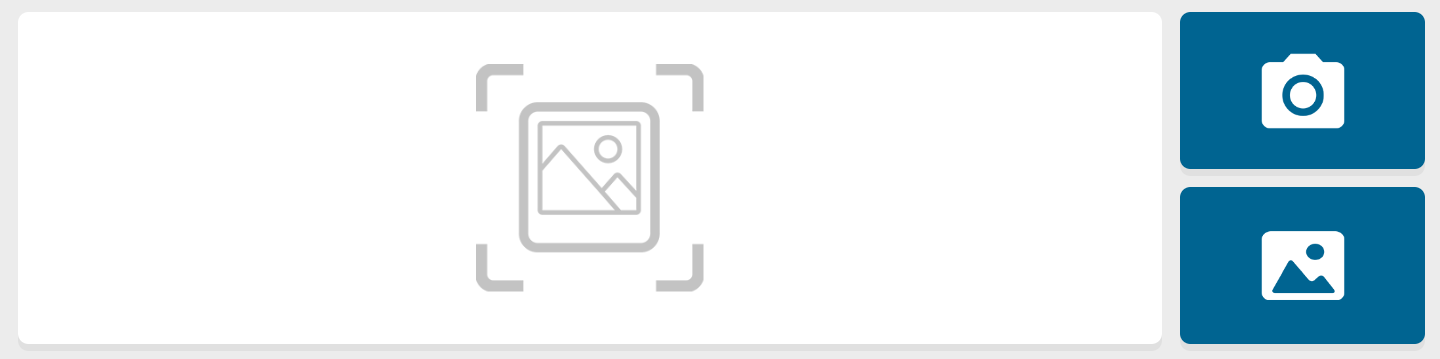
 Take a Picture of your observation!
There are two ways you can add a picture to your observation:
1) Click on the camera symbol ![]() to open the camera on your smartphone. Take a photo.
to open the camera on your smartphone. Take a photo.
2) Open the gallery on your smartphone by clicking on the image icon ![]() . Choose a photo you took before and upload it to the app.
. Choose a photo you took before and upload it to the app.
Note: To upload or take a picture with the App, you have to allow it to have access to your phone's camera and photo folder. The App will ask your permission the first time you use it after installing - click "Accept".
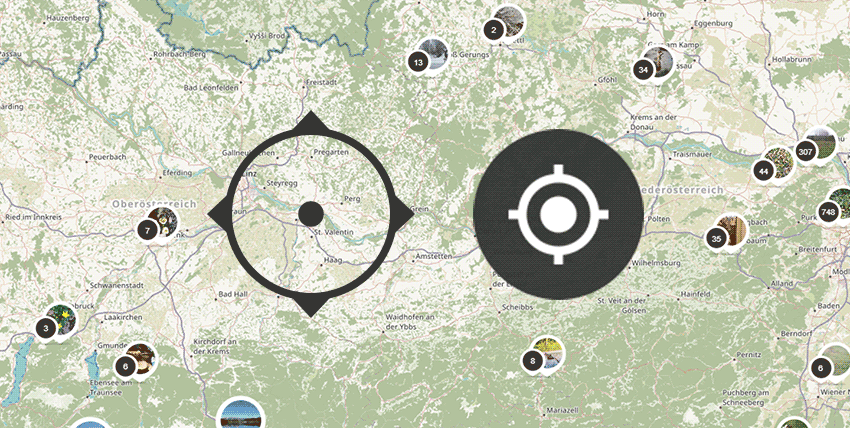
 Look at the location on the map!
Above the entry form, you can see the map. There is a crosshair pointing to where you want to locate your entry. You can drag the map to the correct location or use the location symbol ![]() beneath the binoculars in the map to jump to your current location when entering your spot using the phone's location services (aka GPS). This may take a few moments, depending on signal strength.
beneath the binoculars in the map to jump to your current location when entering your spot using the phone's location services (aka GPS). This may take a few moments, depending on signal strength.
Suppose the crosshairs ![]() do not automatically jump to your current location when using the location symbol. In that case, you can also search for it via the address
do not automatically jump to your current location when using the location symbol. In that case, you can also search for it via the address ![]() or manually drag the map to the correct location under the thread.
or manually drag the map to the correct location under the thread.
Note: Entering the correct location on the map is very important for most projects, as the contributions are always location-based. Help keep the data quality high and please always pay attention to the correct place. Thank you!
 Private Spots
Sometimes you may not want to let others know where exactly you made your spot, e.g. if you found an endangered species or when you're observing your own garden. You can hide the location in the app from other users by selecting "Hide coordinates" above the save button - so your spot is visible in the list view and can be commented on by other users, but the marker does not appear on the map. With "Hide Spot", you can hide your post completely from others in the app - so your spot is only visible to you and the project admins.
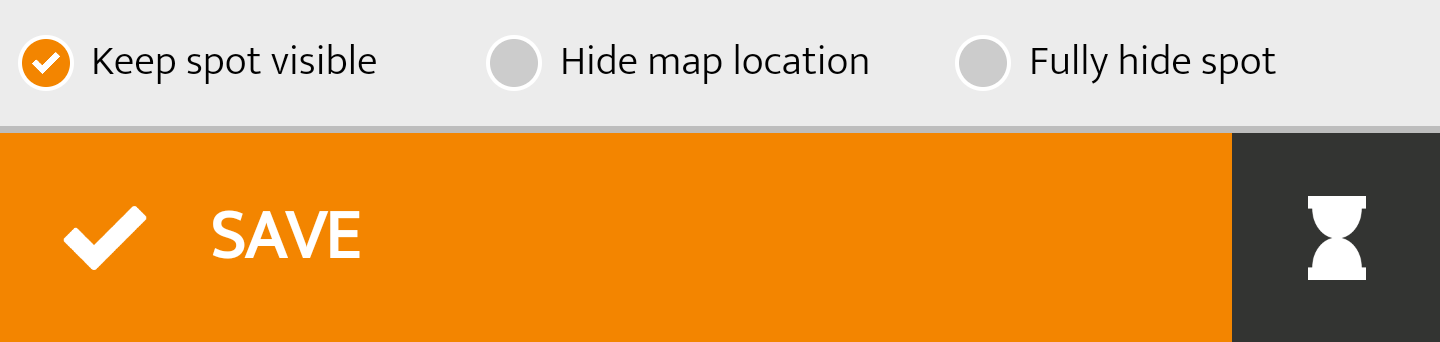
 Save Spot
After you click "Save", your spot will appear on the map. Congratulations, you just created your first spot! A short message with a thank you pops up for confirmation.
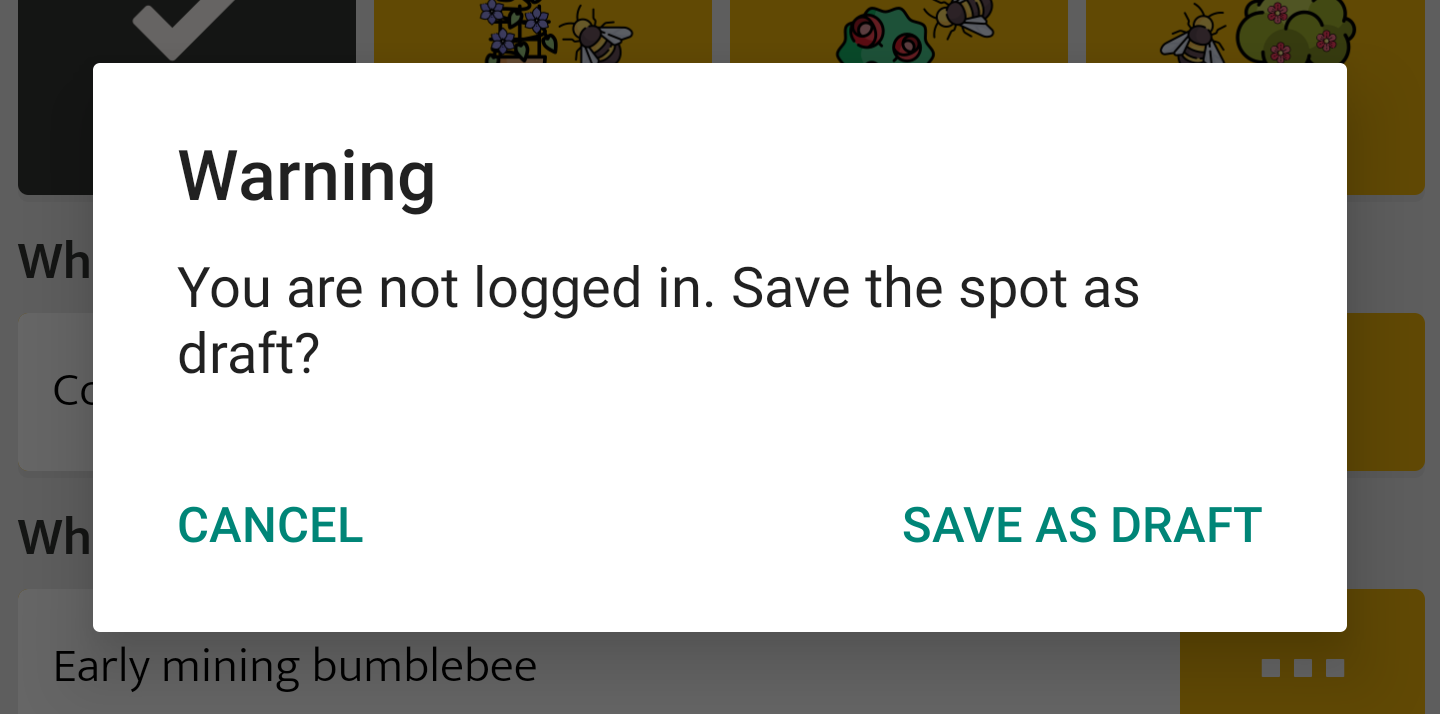
If you're not already logged in to the App, the App asks if you want to log in. The App saves your Spot in the queue, and you can upload it later.
 Save Spot for Later Upload
Not quite sure about your spot yet? With the hourglass icon ![]() at the bottom right, you can put your spot on the waiting list and upload it later. This option is convenient if you're in an area where there's no internet connection.
at the bottom right, you can put your spot on the waiting list and upload it later. This option is convenient if you're in an area where there's no internet connection.


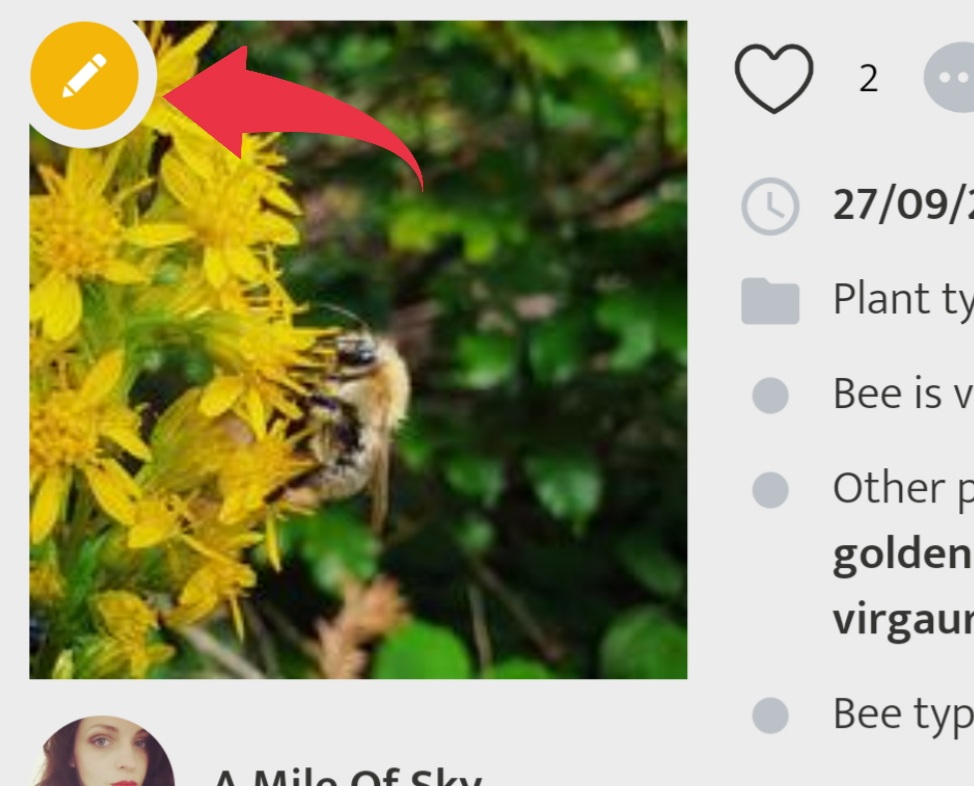
If you want to correct a spot, you can go into edit mode in the app for your own posts. To do this, use the pen icon ![]() in the Spot view. After that, you can change the categories and attributes of the post, for example, to change the classification, correct text errors or exchange the photo.
in the Spot view. After that, you can change the categories and attributes of the post, for example, to change the classification, correct text errors or exchange the photo.
Change the position on the map.
In Edit mode, you can also correct the position on the map by dragging the card under the crosshair to the correct location. If it's an entry in a time series, go to the first entry in your series.
Save changes
When you've made your changes and everything looks good, press "Save" again. After uploading the edit, you will receive a short confirmation message that your changes have been successful.
Your spot is locked?
Project leaders can review and validate contributions. If this is the case, your spot will receive a green award: ![]() - Once your spot is checked and validated, you cannot change it anymore. If you still want to make changes, please contact the project leaders.
- Once your spot is checked and validated, you cannot change it anymore. If you still want to make changes, please contact the project leaders.

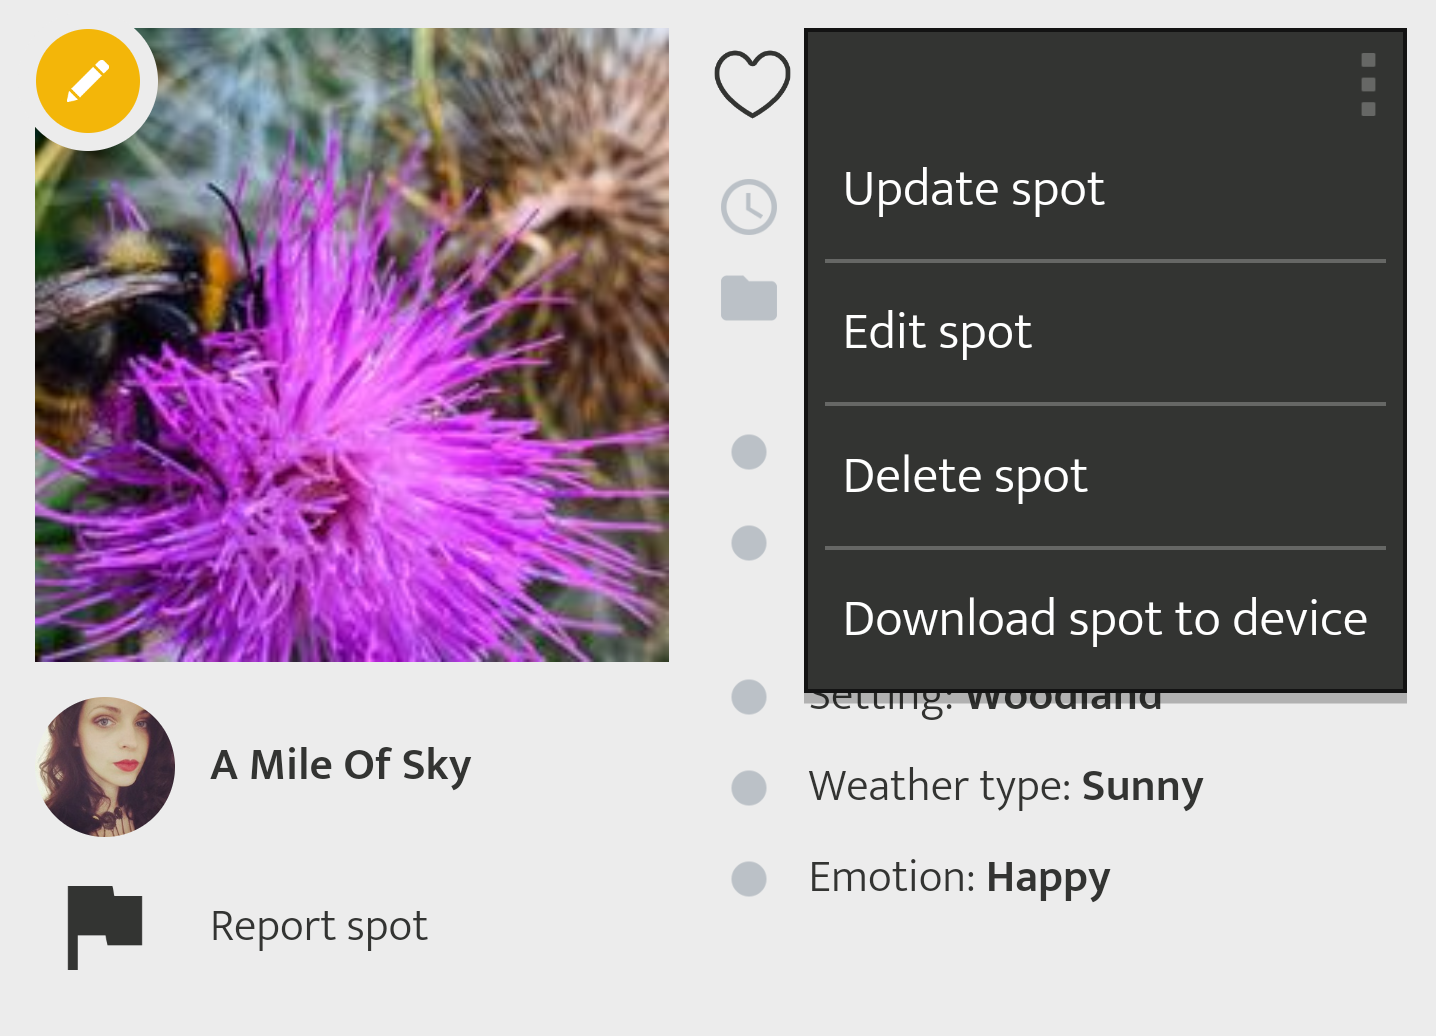
You can add multiple entries to a location by creating timelines. The ![]() icon in the detail view allows you to add additional observations to your spot. Alternatively, you can add another entry from the Spot menu
icon in the detail view allows you to add additional observations to your spot. Alternatively, you can add another entry from the Spot menu ![]() by clicking on 'Update Spot'.
by clicking on 'Update Spot'.
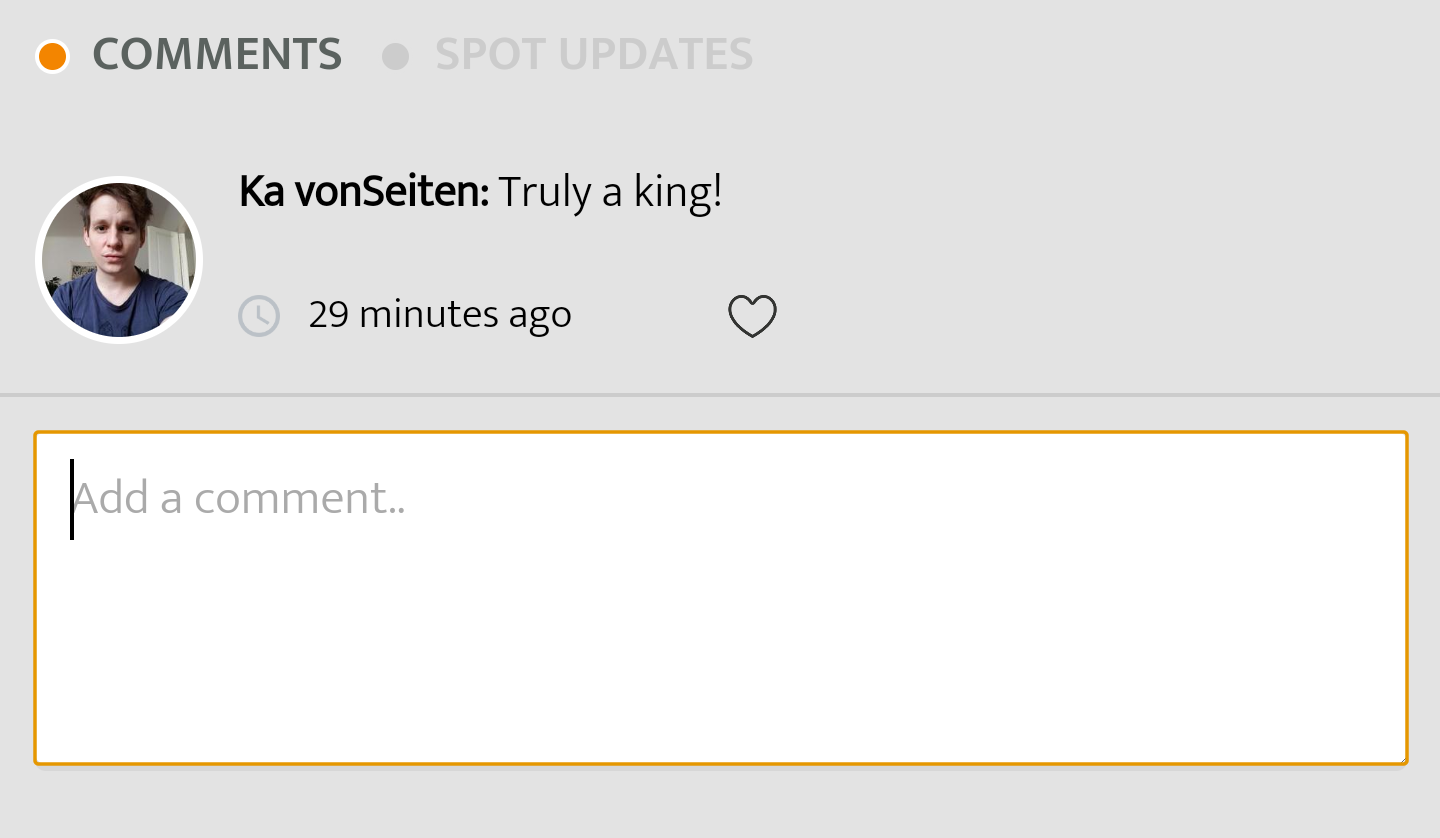
You can drag (swipe) left and right in a spot to scroll through the chronological time series in the app. Also, in the tabs below the details of a post, you can find the SPOT UPDATES area. Here you can see an overview of all Spots in the timeline.
(Please note that the Spot Update feature is not enabled in all apps on the SPOTTERON platform.)

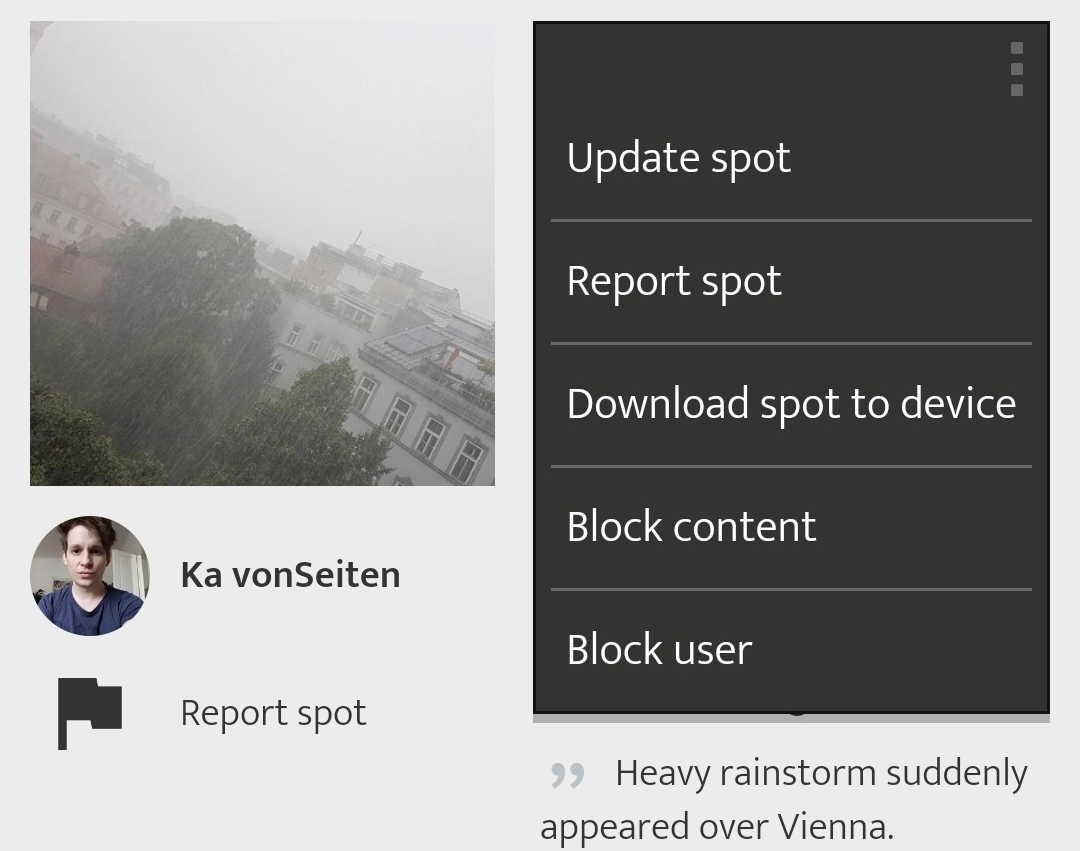
To delete one of your entries, click on the icon with the three dots![]() and select "Delete spot". in the upper right corner and select "Delete Spot". If your spot is an entry in a timeline (spot update), only the spot will be deleted. The rest of the timeline remains.
and select "Delete spot". in the upper right corner and select "Delete Spot". If your spot is an entry in a timeline (spot update), only the spot will be deleted. The rest of the timeline remains.
If the entry "Delete Spot" is not visible, the project managers may have already validated the post. If this is the case, your spot will receive a green award: ![]() - Once your Spot has been checked and validated, you cannot change or delete it. If you still want to perform a deletion, please contact the project managers.
- Once your Spot has been checked and validated, you cannot change or delete it. If you still want to perform a deletion, please contact the project managers.

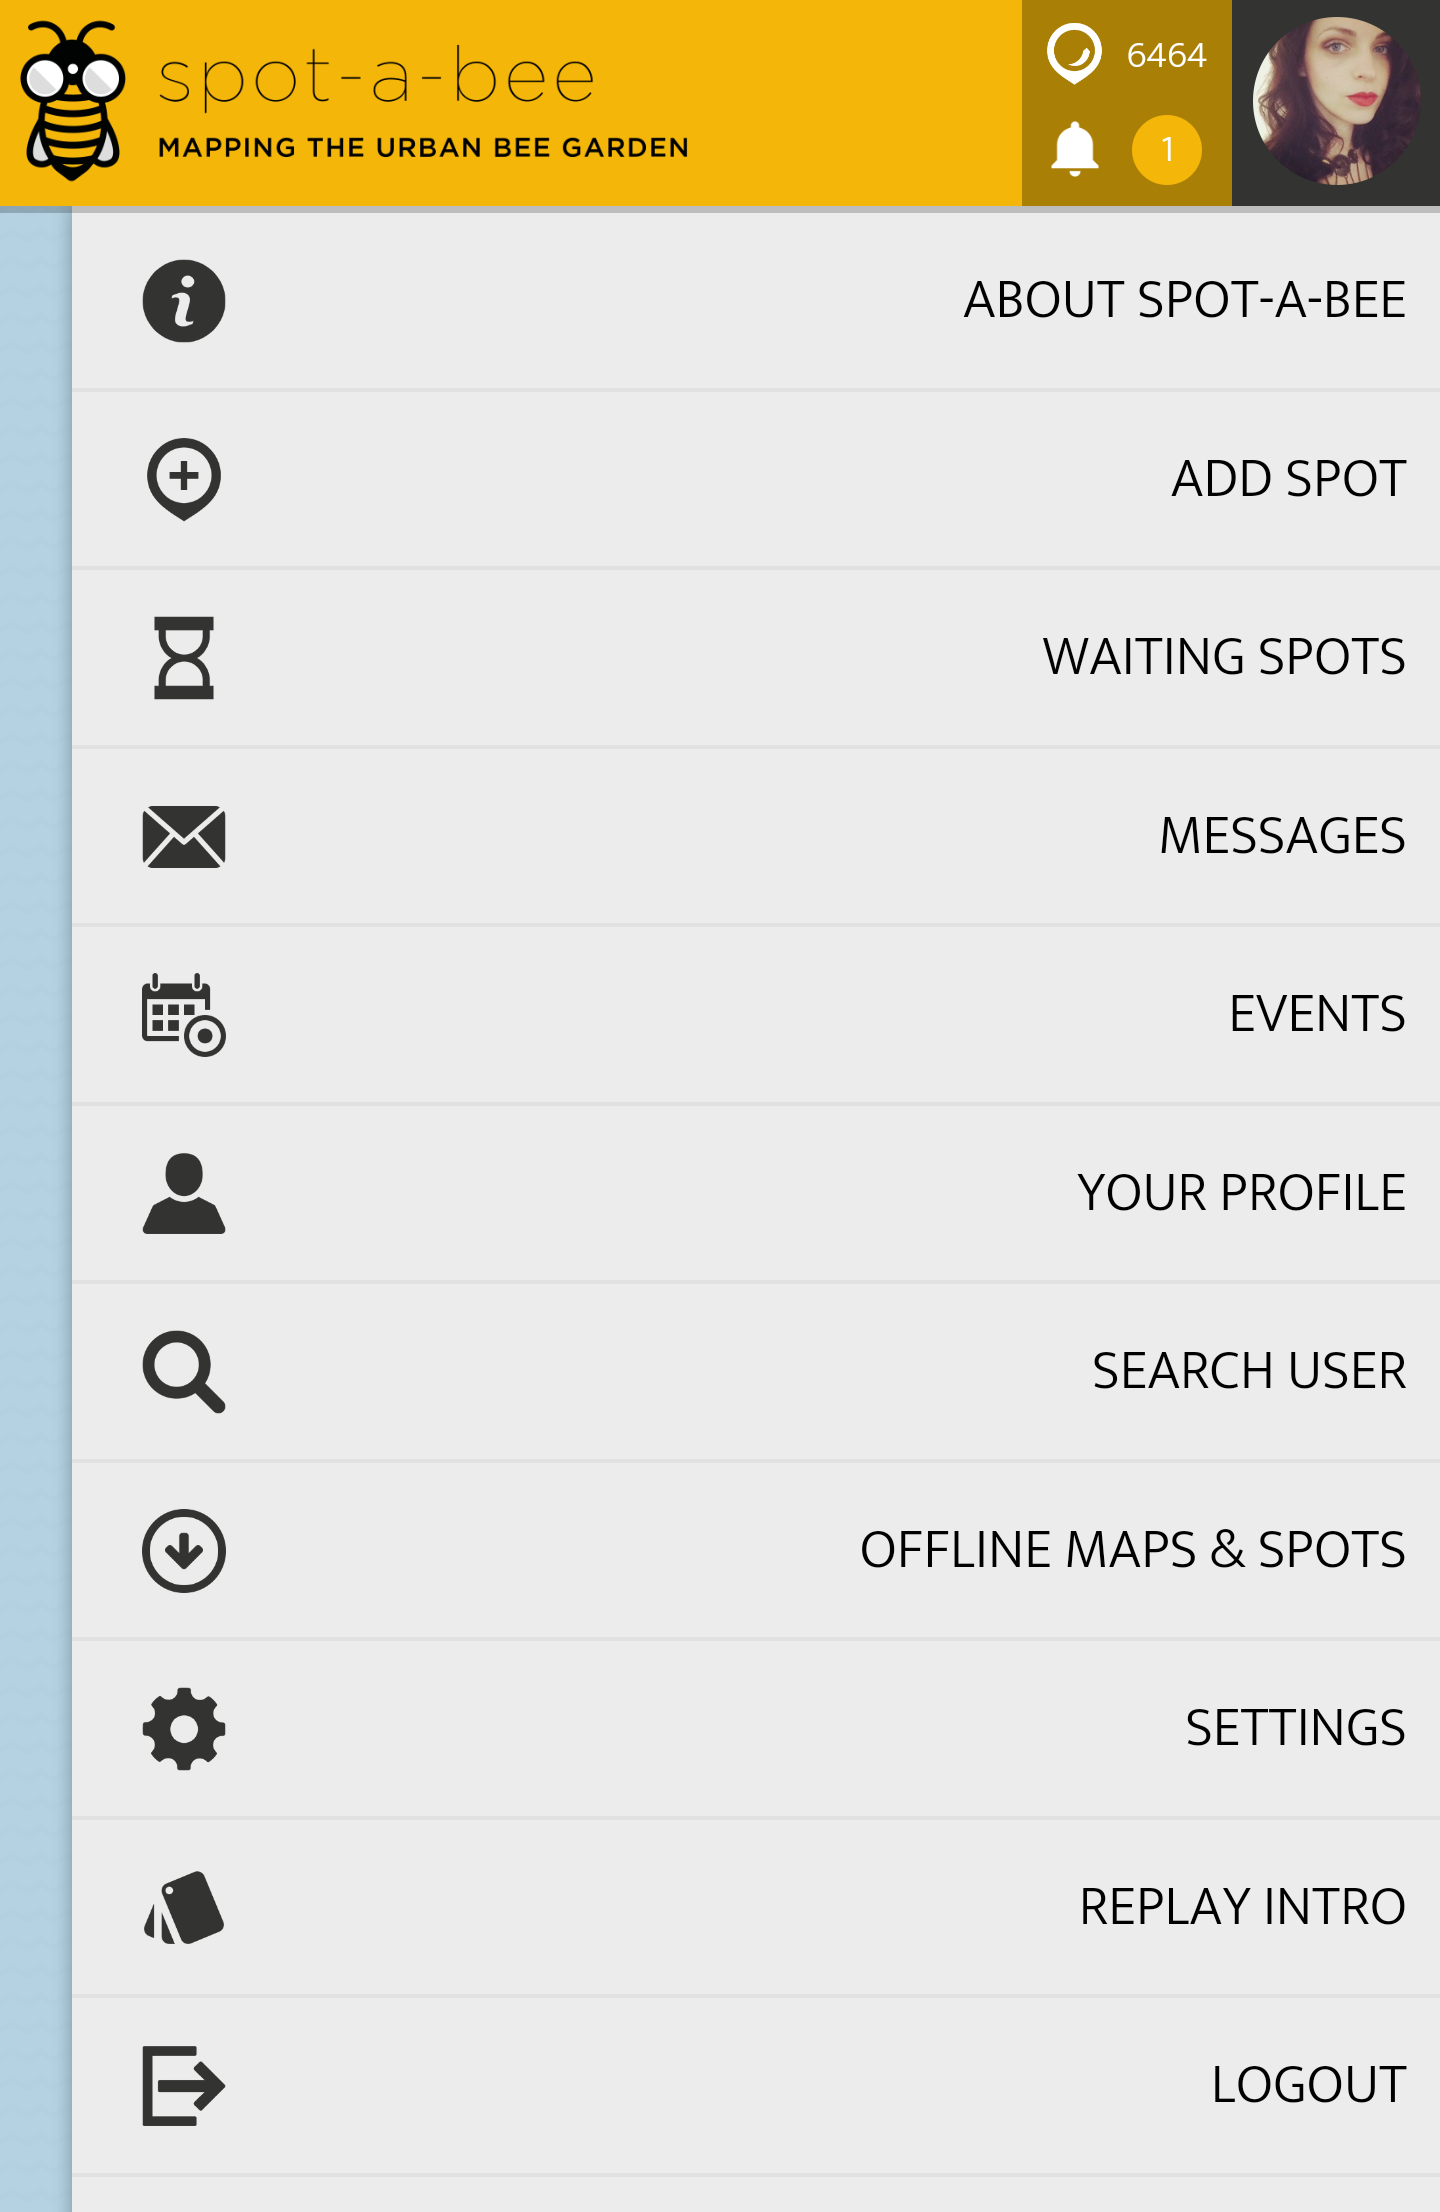
In the main menu, you will find information about the project, "Waiting Spots" that you have created as a draft, messages from the project, your user profile, personal settings (e.B. language and map background), the intro instructions, the possibility to search for other users and a button to unsubscribe from the app.
About the project: Here, you'll find a detailed description of the project and further links.
Add Spot: In addition to adding in the main view, you can also create a new spot from here.
Waiting Spots: Here, you will find all spots that you haven't uploaded yet, e.B. if you were offline when you entered or saved posts to the waiting list. You can access these locally stored entries in the following dialogue, control them, edit them again and then upload them to the project.
Messages: From time to time, the project managers or SPOTTERON send a message to all users. You will find them all listed chronologically in this section.
Events: In doing projects, there are events and events, e.g. workshops or themed events. You can list them under this menu item.
Your Profile: Another way to access your user profile and the different areas. Here's also edit mode for your profile, where you can provide more information, change your display name, add a profile picture, specify your interests, and more.
Search User: Here, you can search for other users and then follow them. So you can create your network of friends and interesting contacts in the app and on the platform, and you never miss their latest posts or comments.
Offline Maps & Spots: You can save a snippet of the map to your smartphone to use when you're offline. The offline maps can also be managed and deleted in this interface. You can also list and manage your locally stored offline spots in the following section.
Settings: Here, you can change the language of the app, the design of the card, as well as your password. The settings also include options for receiving a copy of your saved cards and deleting your user account and personal data on SPOTTERON.
Replay Intro: Here, you can replay the intro that appears when you first open the app.
Logout: Here, you can log out from the app on your current device.
The apps on the SPOTTERON platform are all similar and share a common layout. This makes it easy to participate in multiple projects actively, and you can log in to all the apps with your SPOTTERON user account and get started right away.
For Smartphone Apps:
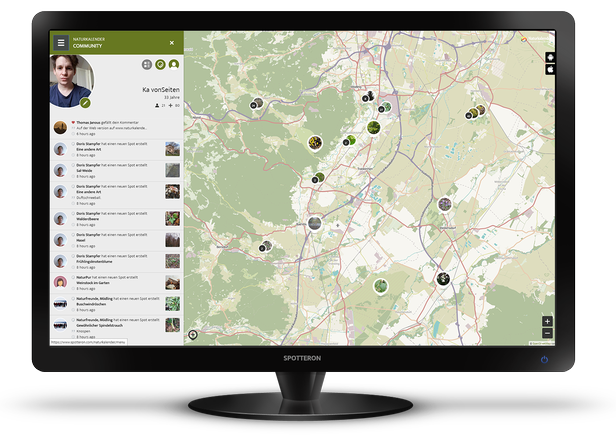
It's best to take your smartphone and open the SPOTTERON app of your choice. After you launch the app, you'll find yourself on the map view. Above and below the map are the central interface elements. Let's go through the individual areas step by step together:
Upper line:
This is the upper line of a SPOTTERON app, zoomed in:

At the top is the logo of the project. You can press this to get to an info text about the project and the imprint. To the right of this, there are three essential elements:
![]() Spots Counter: Here you can see the total number of posts in each project. Pressing it opens the list of current new entries in the app by you and other users.
Spots Counter: Here you can see the total number of posts in each project. Pressing it opens the list of current new entries in the app by you and other users.
![]() Activity Notifications: This number shows you if there is personal news about your posts, community, or project itself. You can use this item to open a list of activities and notifications (newsfeed).
Activity Notifications: This number shows you if there is personal news about your posts, community, or project itself. You can use this item to open a list of activities and notifications (newsfeed).
![]() Log-In/Logged in User: If you are already logged in to the app, the 3rd panel shows your profile picture. If this is still not the case, the area shows a key icon, and you can press it to get to the login area. When you are logged in, tapping the profile picture opens the list of activities and notifications (newsfeed) and the other pages of your user profile, such as your Spot Collection, people you follow on the platform, and your public profile information.
Log-In/Logged in User: If you are already logged in to the app, the 3rd panel shows your profile picture. If this is still not the case, the area shows a key icon, and you can press it to get to the login area. When you are logged in, tapping the profile picture opens the list of activities and notifications (newsfeed) and the other pages of your user profile, such as your Spot Collection, people you follow on the platform, and your public profile information.
Middle Section of the App:
At first, the middle section shows the map. If you allowed access to your location the first time you started the app, the map automatically zooms to your approximate location. In the middle section of the app, you will see the different panels, community panels, and the app's input dialogue. You can close each panel again with the X button to return to the full map view.
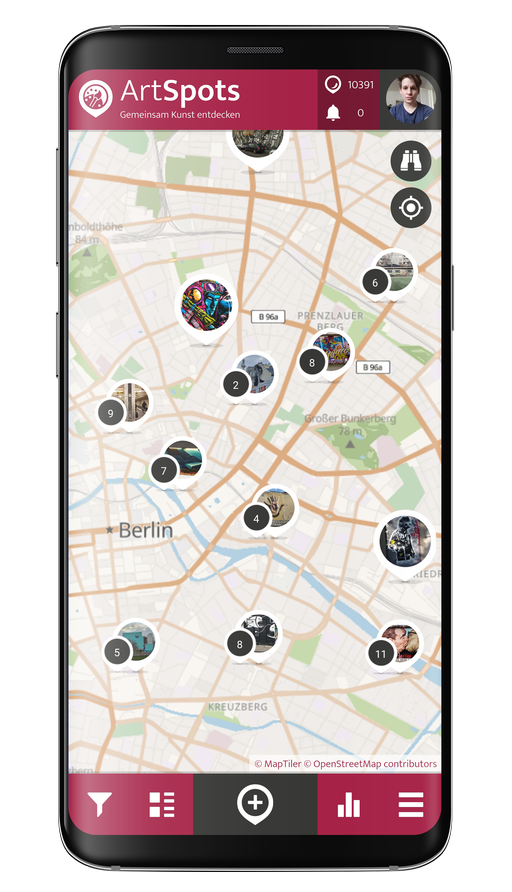
Lower Line:
This is the lower line of a SPOTTERON app:

At the bottom are the main elements for navigating between each app area.
![]() Filters: in the Filter Panel, you can use various display options to filter the map entries and lists. Active filters are indicated with an icon on the map.
Filters: in the Filter Panel, you can use various display options to filter the map entries and lists. Active filters are indicated with an icon on the map.
![]() Lists: the list panel shows the entries in the app. In the panel heading, you can switch between different views:
Lists: the list panel shows the entries in the app. In the panel heading, you can switch between different views:
- The default view is the chronological list (New Spots), where you can always see the latest posts in the app.
- The Visible Spots View lists the entries and stacks in the current section of the map.
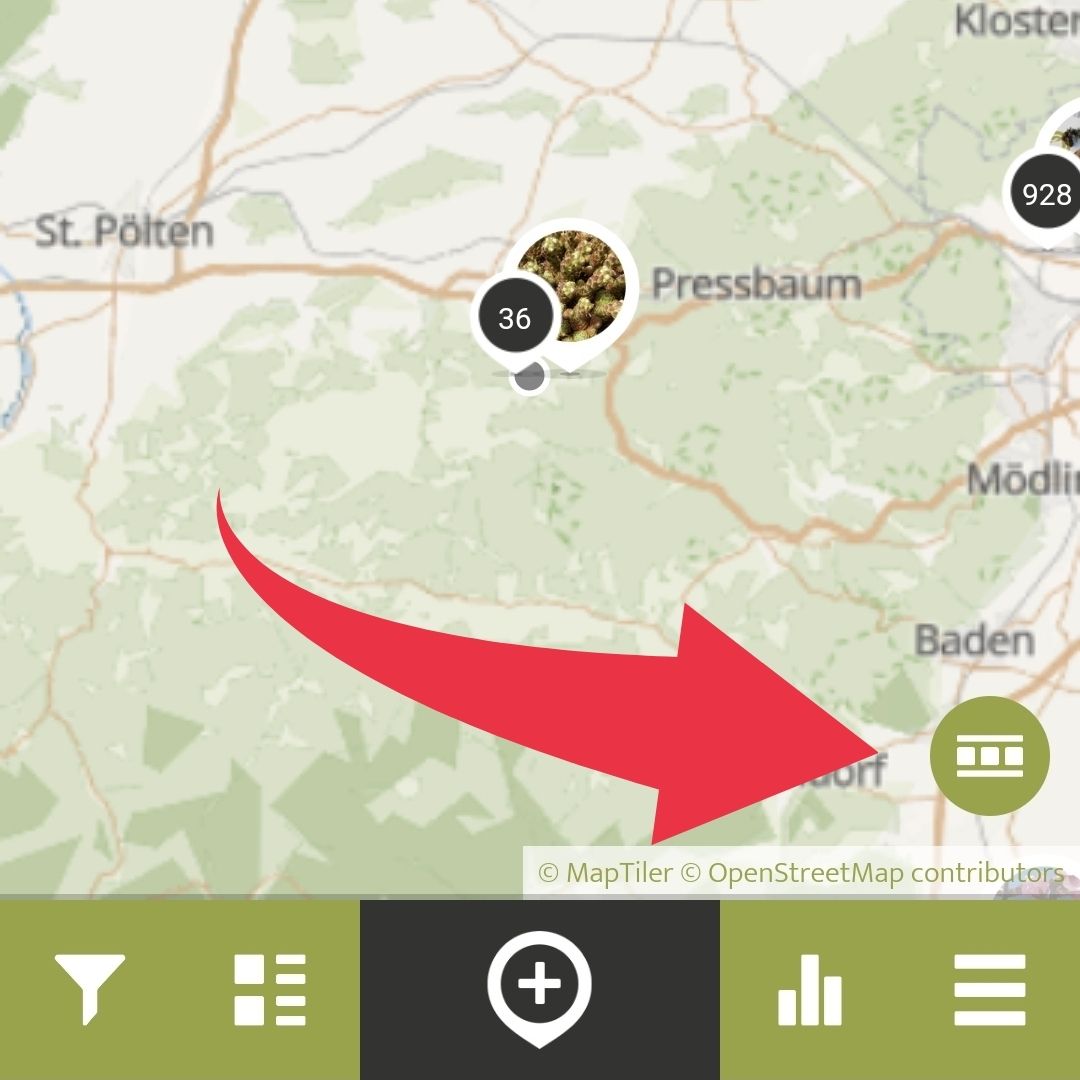
![]() Add Spot: In the middle, there is a central button for entering new spots.
Add Spot: In the middle, there is a central button for entering new spots.
![]() Statistics: the statistics panel contains various summaries. You can switch back and forth between the different areas at the top of the panel or by swiping. The individual areas are:
Statistics: the statistics panel contains various summaries. You can switch back and forth between the different areas at the top of the panel or by swiping. The individual areas are:
- Ranking: here, you can see the most active users: in the app
- Top categories: here, you can see the most frequently entered main categories in the app
- Interactive timeline: here, you can select main categories and display their frequency as statistics over time
![]() Main menu: In the main menu, you will find access to other core areas of the app, the settings and also the upload waiting list of your offline entries
Main menu: In the main menu, you will find access to other core areas of the app, the settings and also the upload waiting list of your offline entries
For Browser Maps
In the browser map, you can use the same functions as in the smartphone app. You can find the individual areas via the horizontal menu in the upper bar.
You will find the icon to open the registration form at the bottom left to enter new spots.
At the top right, you can see the icons for Android and IOS. There you can open the respective app store pages to install the smartphone app for the project.

You're not alone in the App - besides entering new posts on the map, there's an entire community that welcomes you! Many functions are available to interact with the other participants.
 Your Profile & the Community
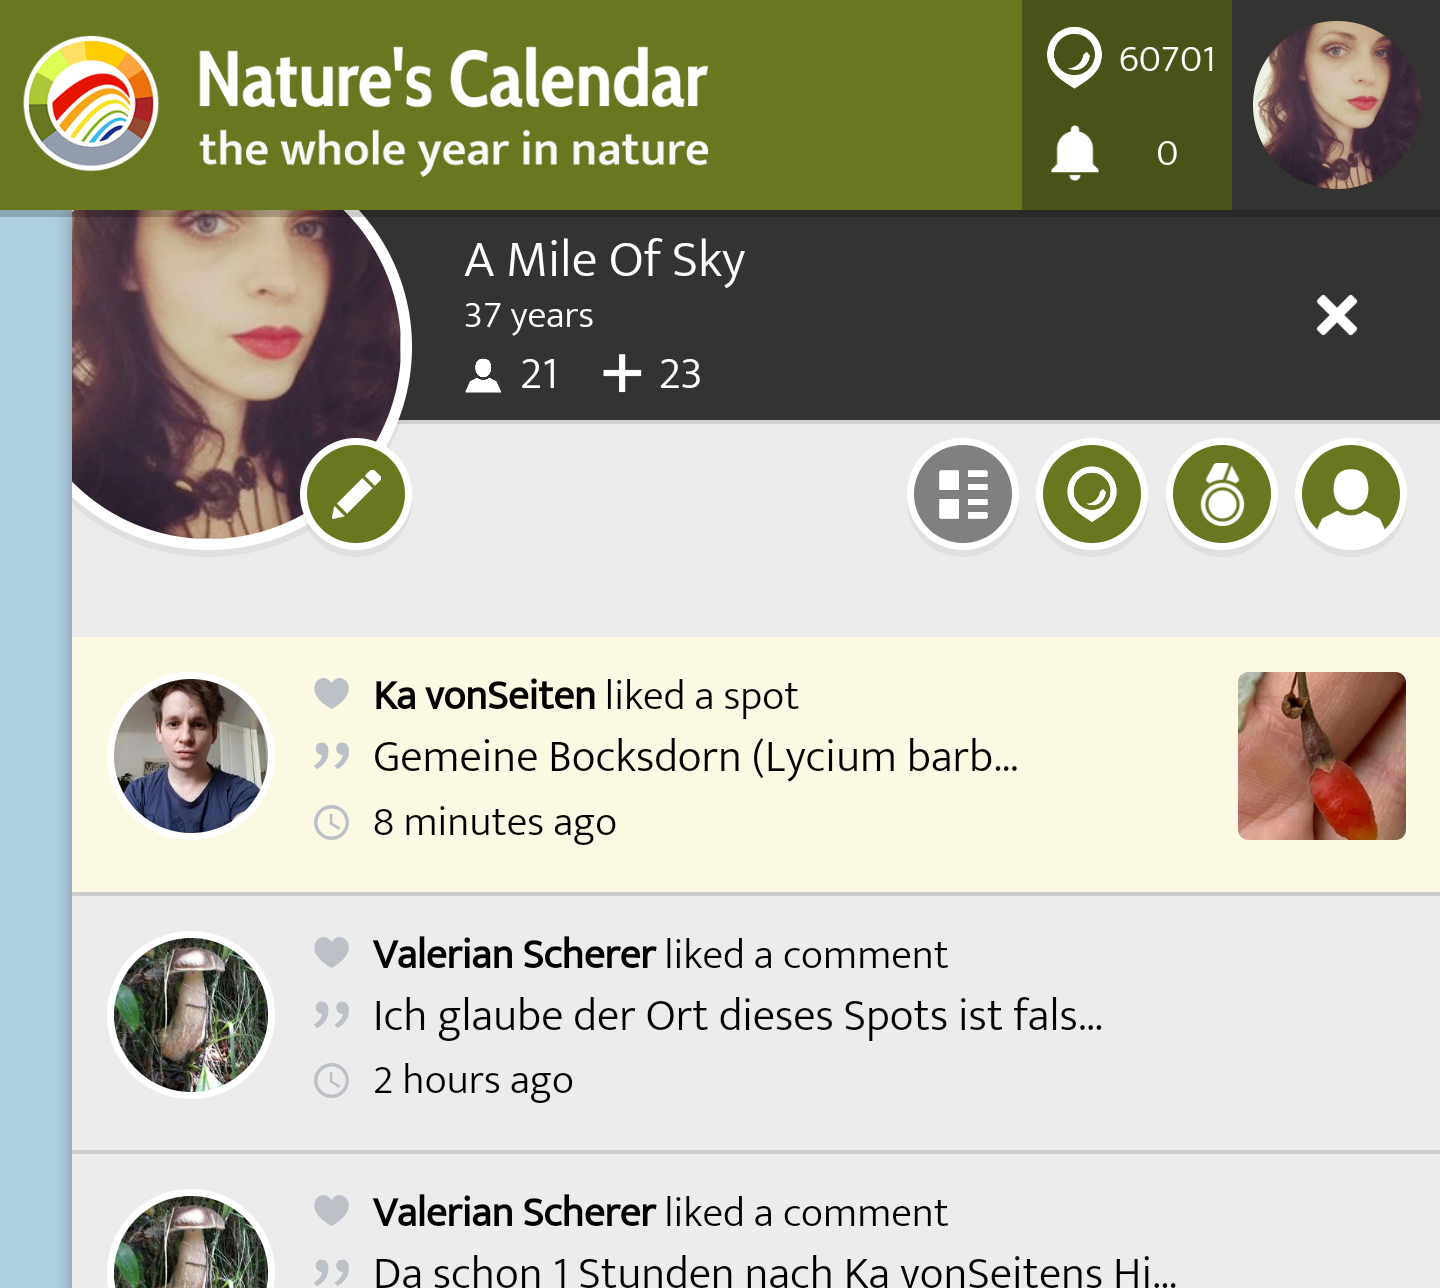
By clicking on your profile picture at the top right, you access your user profile.
Your user profile consists of the list of notifications from the App, an overview of your posts, your badges, and your profile, which you can edit with the pen icon. You can switch between the individual areas via the icons at the top right or by swiping in the panel. If you keep scrolling, you will still find lists of users you follow and follow you.
 Notifications (Newsfeed)
The central view is the notifications that summarise all activities and news from your Friends network and the project chronologically. Here you will find the latest new spots from users you follow in the App, comments on your own posts or replies to your comments in other spots, news that the project has sent to all users or notifications about your posts such as likes and content corrections by moderators.
 Your Spot Collection
The second panel provides a collection of your own posts in the App.
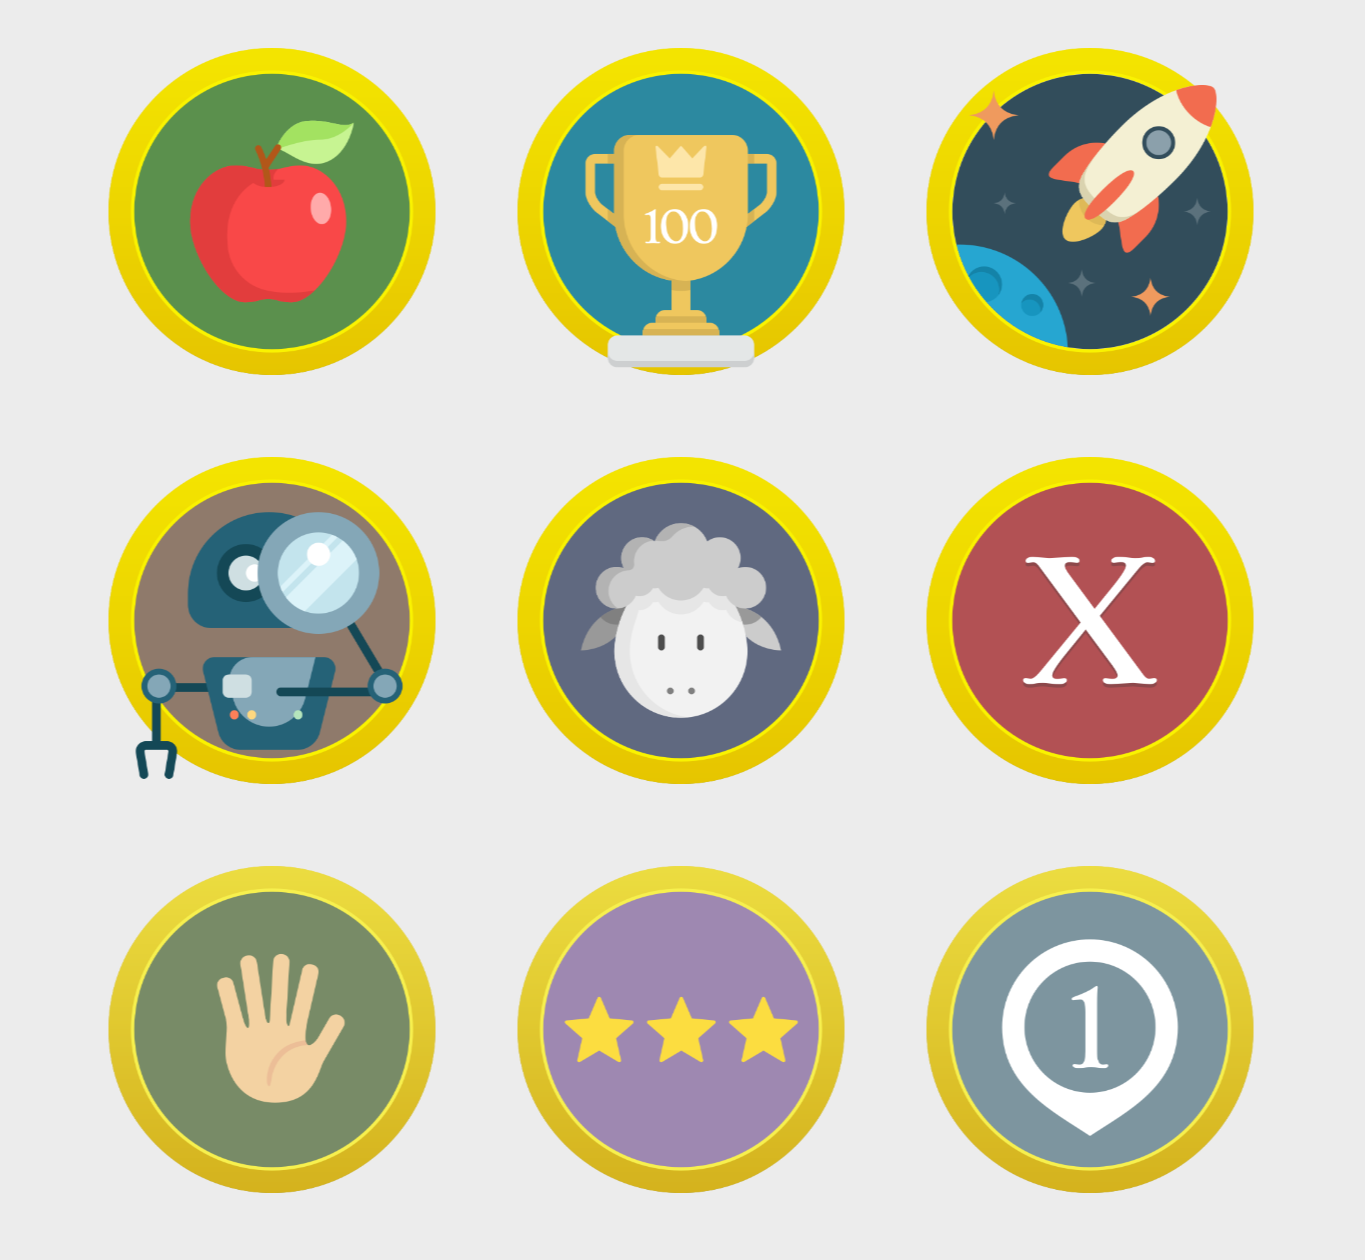
 Badges
By being active in the App, you can collect a variety of funny badges. After creating your first spot, you will find a little thank you for participating.
 Public Profile
You can provide additional information about you, your background, motivation, and equipment to your account. These are optional and will be displayed to other people in the app to help your friends find you on the SPOTTERON platform and connect with you.
 More Panels
If you scroll further to the right (swipe), you will get to the overview pages of the users you follow on the platform and those who follow you. You can use the Button sequences to link yourself to other users.

In the App, you can interact with other users. Each project on the SPOTTERON platform includes a user community, and you have a variety of interaction options at your disposal.
 Liking Spots and Comments
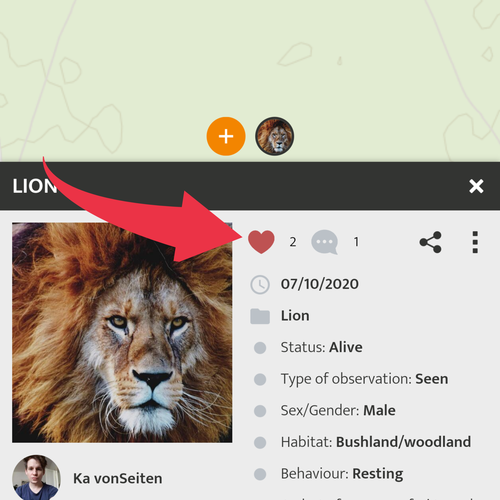
In the posts of the other users: inside the App, you will find a heart above. If you like a post by a user or a user, you can mark it with a heart (liken). The author of the spot will get a notification.
Next to the heart is a number that shows how many times different users have liked the post:
You can also like individual comments with the heart button in the comments that are under an entry.
 Commenting on Spots
In the detail-view of other entries, you can comment on the respective spot and share your thoughts, make correction suggestions, or even ask questions if you need help.
Each comment has a time log, and you can express your appreciation (like) by clicking on the heart icon.
The comments are publicly visible and should not be used for private conversations. Please always be polite and follow the netiquette and community guidelines of the Terms of Use!
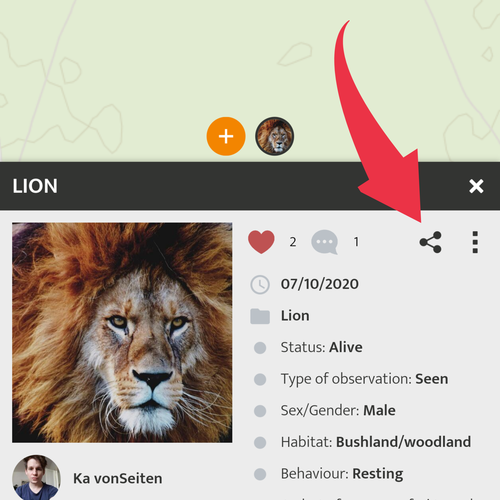
 Share Entries
The Share feature allows you to share entries on social media and smartphone apps with many other apps such as messengers and note apps. If you share entries on other platforms, you are actively helping to promote the project and the App to your friends!
With the share button, you can also use the direct link to an entry, and you can send the link with any medium, e.g. e-mail.
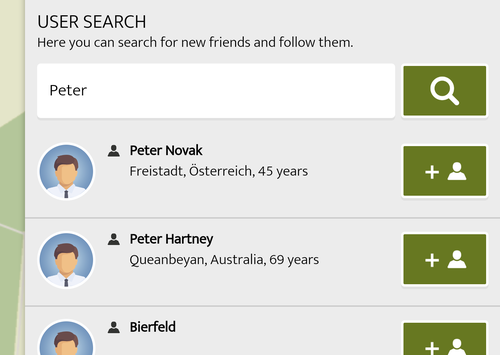
Follow /unfollow users. 
To avoid missing new entries from certain users, you can follow them: click on the profile picture or the name in an entry to go to the user's profile. There, you can click on "follow" to connect with them. The user gets a notification, and he or she may follow you back.
With the user search in the main menu, you can search for your friends and acquaintances on the platform.

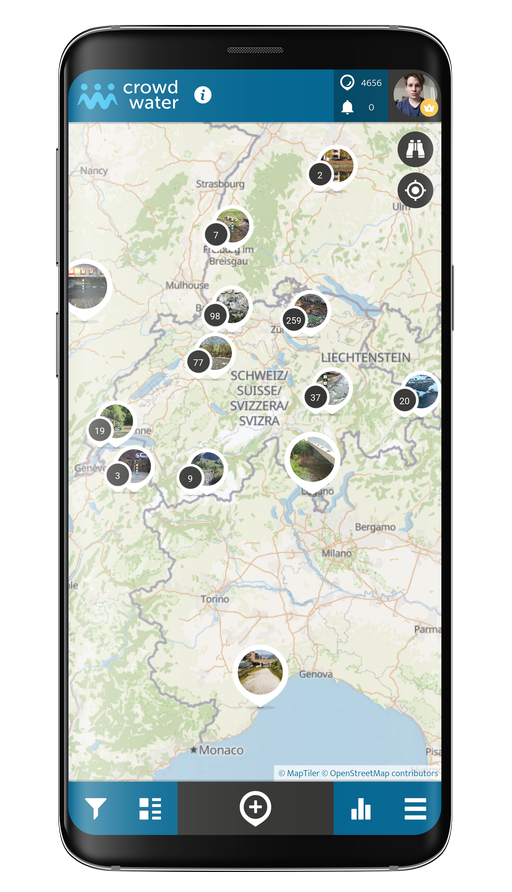
By clicking the Data Visualisation Overlay button, you can see different data visualisations of Spots within the app.
Currently, you can choose between two different kinds of visualisations, the classic heatmap that shows the density of Spots with colours, or the Distribution Dot Map which is visualised on a grid, with more Spots in bigger, and less in smaller circles.

In the App settings, you can download a copy of your personal data at any time. To do this, enter your password in the dialogue box and press "Request copy". The export may take a few moments, and you can download an archive with your data as a CSV file right afterwards.
Delete Account and Personal Data
In the app settings, you can also delete your account and all your personal data. Enter your password again and press the "Delete Now" button. You will be asked again in a dialogue for your confirmation - but beware! Deleting your account can no longer be undone.


When you first launch the app, you'll be asked if you want to allow the app to access your location. The location of your posts is an essential part of all apps on SPOTTERON.
Please allow access to the location service the first time you start the app to use it without any problems. On the map, you can see a dot with a circle around it. The dot is the location that the app gets back from your smartphone, and the circle represents approximate accuracy.
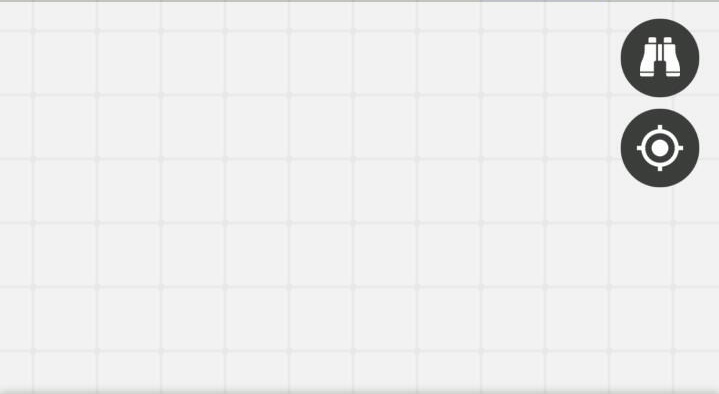
In the app, you can always use the location icon: ![]() to jump to your current location. This may take a few moments, depending on the signal strength.
to jump to your current location. This may take a few moments, depending on the signal strength.
When entering a spot, the map is above the entry form. On the map, there is a crosshair ![]() that points to where you want to locate your entry. You can drag the map to the correct location or use the location symbol
that points to where you want to locate your entry. You can drag the map to the correct location or use the location symbol![]() here to jump to your current location using the phone's location services (aka GPS).
here to jump to your current location using the phone's location services (aka GPS).
Any Issues?
To use your location in the app, the Location Service must be enabled in your phone's operating system. There are also several quality levels in the system settings of your smartphone.
If your location is turned off on your smartphone, close the app entirely, turn on the location service, reopen the app, wait a few seconds and click on the icon (see "Create a new spot")
If the location still does not work despite all attempts, it's possible that the app doesn't have permission to access the location service. Please check your app settings in the operating system or uninstall the app again and reinstall it from your App Store. This allows the app to reaccess your location as if the first time the app is launched.


You can still record your entry and save it as a draft. After that, you can view it under "Waiting Spots" in the side menu. If you have an internet connection again, you can upload the observation. It is good and important to record the entry at the actual time of observation, as it also stores the correct date and not the date of subsequent upload.


If the error message "Warning, you're not logged on" pops up when you save an observation, save the entry as a draft for the time being. The drafts are stored in the "Waiting Spots" section of the main menu, where you can upload it after you've logged in and re-evaluated your Spot.

If you forget your password, there is the "Reset Password" function. Right next to the login form, you will find a text link that will take you to a new dialogue. There you can enter your e-mail address, confirm that you are a human (Captcha) and then press the reset button.
You will then receive an e-mail with another link. Use it to set a new password in your browser.
If you receive the error message: "No valid e-mail address", please check the correct spelling of your e-mail address again and also make sure that there are no spaces at the beginning and end. If everything is correct and the error message still appears, please contact us via
Didn't receive an e-mail?
Please check your SPAM folder. Automated e-mails often end up there. If no e-mail has arrived after some time, please contact us via

If you can't see any content (map tiles) in the map section, please first check whether your smartphone has an internet connection or is in aeroplane mode. If this is the case, please activate your internet connection and restart the app. If no map content appears despite an internet connection, please change the map type in Main Menu> Settings. Sometimes the map provider may also be temporarily unavailable.
If this does not help, please restart your smartphone completely or uninstall the app to reinstall it. If, despite all these steps, the problem persists, please write us at

You can block content and other users you don't wish to engage with by logging into the app, open the Spot menu (three dots on the right-hand side), then go to „More“. Here you can choose to eighter „Block content“ (only this spot will be blocked and blurred out), or „Block User“ (all posts by this user will be blurred out). You can reverse this anytime by clicking „Unblock content“ in that Spot.